Berikut adalah artikel blog tentang resep Baklava Cheesecake yang dioptimalkan untuk SEO:
Baklava Cheesecake: A Decadent Fusion of Flavors
Are you ready to embark on a culinary adventure that tantalizes your taste buds and leaves you craving more? Prepare yourself for the ultimate dessert fusion: a Baklava Cheesecake. This recipe flawlessly blends the crispy, nutty layers of baklava with the creamy, rich indulgence of cheesecake. Get ready to impress your friends and family with this show-stopping dessert!
The Perfect Blend of Tradition and Innovation
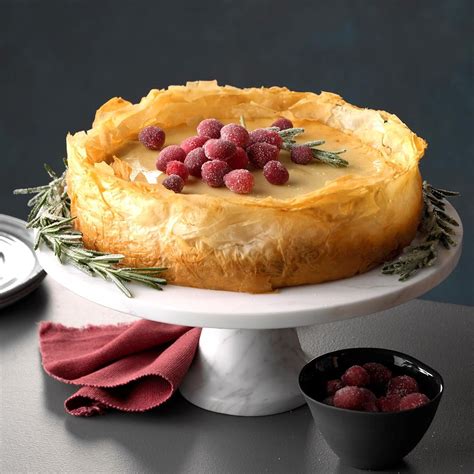
This Baklava Cheesecake recipe isn't your average cheesecake. We're taking the classic New York-style cheesecake and infusing it with the aromatic spices and crunchy texture of baklava. Imagine the creamy, tangy cheesecake filling nestled between layers of flaky filo pastry, generously sprinkled with chopped pistachios, and drizzled with a luscious honey syrup. Sounds divine, right?
Ingredients You'll Need:
For the Crust:
- 1 ½ cups finely chopped pistachios
- 1 cup finely crushed graham crackers
- 6 tablespoons (3 ounces) unsalted butter, melted
For the Cheesecake Filling:
- 3 (8 ounce) packages cream cheese, softened
- 1 ¾ cups granulated sugar
- ¼ cup all-purpose flour
- 1 teaspoon vanilla extract
- ¼ teaspoon ground cinnamon
- ½ teaspoon ground nutmeg
- 1 cup heavy cream
- 3 large eggs
For the Baklava Topping:
- 1 package (14.1 ounces) filo pastry, thawed
- ½ cup (1 stick) unsalted butter, melted
- ½ cup chopped pistachios
For the Honey Syrup:
- 1 cup honey
- ½ cup water
- 2 tablespoons lemon juice
Step-by-Step Instructions:
1. Prepare the Crust:
- Preheat your oven to 350°F (175°C).
- Combine the chopped pistachios, graham cracker crumbs, and melted butter in a medium bowl. Mix well until evenly moistened.
- Press the mixture firmly into the bottom of a 9-inch springform pan.
2. Make the Cheesecake Filling:
- In a large bowl, beat the softened cream cheese and sugar until smooth and creamy.
- Gradually add the flour, vanilla extract, cinnamon, and nutmeg, mixing until just combined.
- In a separate bowl, whip the heavy cream until soft peaks form. Gently fold the whipped cream into the cream cheese mixture.
- Add the eggs one at a time, mixing well after each addition. Be careful not to overmix.
3. Assemble the Baklava Cheesecake:
- Pour the cheesecake filling over the prepared crust.
- Layer the filo pastry sheets, brushing each sheet with melted butter before adding the next. You can tear the filo sheets to fit the pan.
- Sprinkle the top with chopped pistachios.
4. Bake:
- Place the springform pan in a larger baking pan. Pour enough hot water into the larger pan to come halfway up the sides of the springform pan (this creates a water bath for even baking).
- Bake for 50-60 minutes, or until the cheesecake is set around the edges and the center is just slightly jiggly.
5. Prepare and Drizzle the Honey Syrup:
- While the cheesecake is baking, prepare the honey syrup. Combine honey, water, and lemon juice in a small saucepan. Bring to a simmer over medium heat, stirring occasionally. Simmer for 5 minutes, then remove from heat and let cool.
6. Cool and Chill:
- Let the cheesecake cool completely in the water bath before removing it from the oven. Let it cool completely at room temperature, then refrigerate for at least 4 hours, or preferably overnight.
7. Serve:
- Once chilled, carefully remove the sides of the springform pan. Drizzle the cooled honey syrup generously over the top of the cheesecake. Slice and serve.
Tips for Baklava Cheesecake Success:
- Use high-quality ingredients: The better the ingredients, the better the cheesecake will taste.
- Don't overbake: Overbaking can lead to a dry cheesecake.
- Let it chill: Allowing the cheesecake to chill thoroughly ensures a firm and creamy texture.
- Get creative with toppings: Feel free to experiment with other nuts or spices to customize your baklava cheesecake.
This Baklava Cheesecake is a guaranteed crowd-pleaser. Its unique flavor combination and elegant presentation make it perfect for special occasions or simply a delightful treat for yourself. Enjoy!